Thought I'd share with you what we've done for our part in recycling unwanted concrete water pipes from the past.
I found these great old concrete drainage pipes and thought, "you know, a plant would look awesome in this thing!". So next thing you know I used all my strength to put these heavy old relics into my truck, took a short break then moved them into our yard :) They really are heavy and when I look at them I wonder how I got them here...I say the same thing about most of the yard and garden art we have! lol
So here is a few pics of where we put these old water drainage pipes and how we ran drip line up the middle to help water our future plants.
This is where we placed the smaller of the two water pipes. Don't mind the rain drops in the pictures,the rain finally showed up and made it a great day to work outside! This second image shows the tools you will need to complete this project: Something sharp to poke a hole into your main drip line, an elbow connector and some 1/8" drip line tube.
Next, you'll have to lay the heavy water drainage pipe on it's side to get to the main water line that we need to connect to. Once you have room to work, you'll need to dig down and find you main water supply line. Remember to dig carefully so as not to damage your water line!
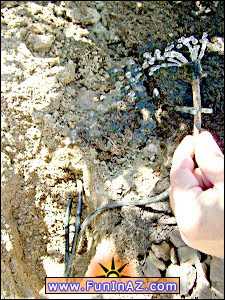
Now poke a hole into the main water supply line and insert the elbow drip line connector. Place the 1/8" drip line onto the elbow before inserting the elbow into the main water line to make things easier. You will also want to push the 1/8" drip line into the hole of the water pipe so when you put the water drainage pipe back up, you can grab it.


Fill the hole back in with dirt and stand the drainage pipe back up. You should now be able to look down inside the pipe and see your dip line tube. You will also want to note that the line should not have any part of the concrete drainage pipe sitting on it. Your new 1/8" drip line tube should be cut off no less than 6" above the opening and capped off until you have a plant to place. I like to leave a little extra drip line, about 6"-10", and coil it under the dirt beneath the plant in case you have to ever make repairs such as adding a different size emitter head. A lot of times once you put on an emitter, the sun will bake it onto the drip line making you to have to cut the drip line just before the emitter, thus shortening your drip line and eventually causing you to use in-line connectors which increases the chance of leaks. (leaks would not be a problem in this set up, however they would be if your doing horizonatal repairs, so it's a good habit to create when installing drip lines.)


Now the job is complete!
For ease of access you can see I've kept the drip line sticking out of the top of this great looking water drainage pipe for now. It's just waiting to water some interesting plant in the near future. The easy part is over, the hard part is choosing a cool plant to put in it :) You could plant something that hangs down, something that grows up, or even plant both to give an extra cool look!